
How to capture an invoice
You are able to capture an invoice in 4 different ways:
- Once an appointment has been finished and the user has clicked ‘check out’ from the ‘Waiting room’ a pop-up will appear asking you if you would like to complete the invoice for that appointment, click ‘Yes’.
- On the ‘Accounts’ page, on the left menu, click ‘Capture invoice’.
- On the ‘Accounts’ page, search for a specific patient. Once you have found the patient, click on the patient. The ‘Account Details’ page will open, select ‘Capture invoice’.
- On the ‘Accounts’ page, on the right of the listed patients click on the quick menu (...)
How to capture an invoice
- From your preferred method click on ‘Capture invoice’.
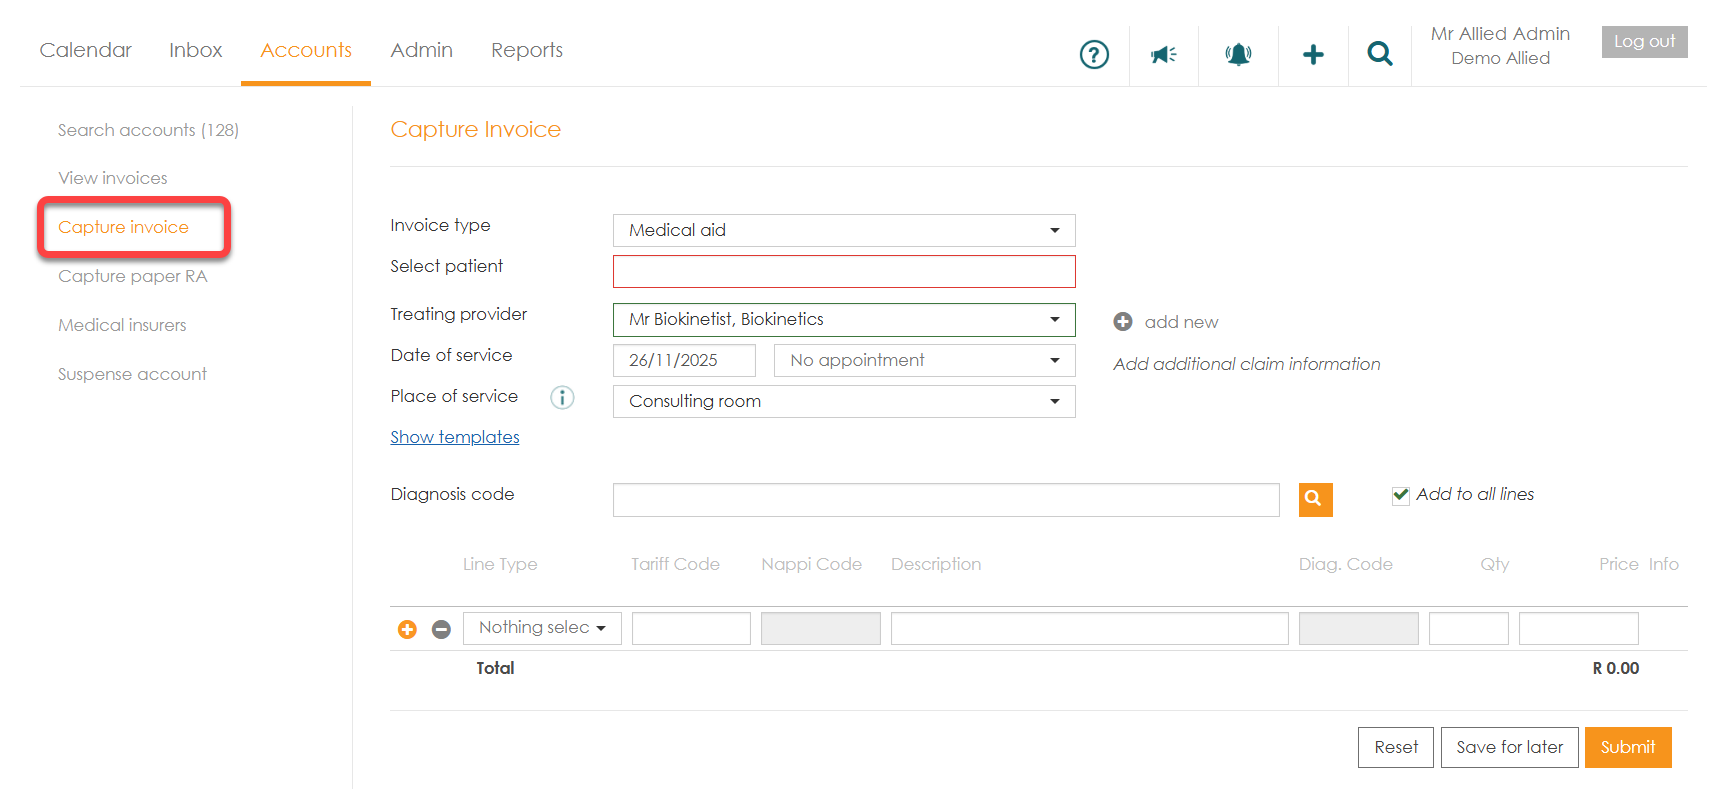
- Select your invoice type, either cash or medical aid.

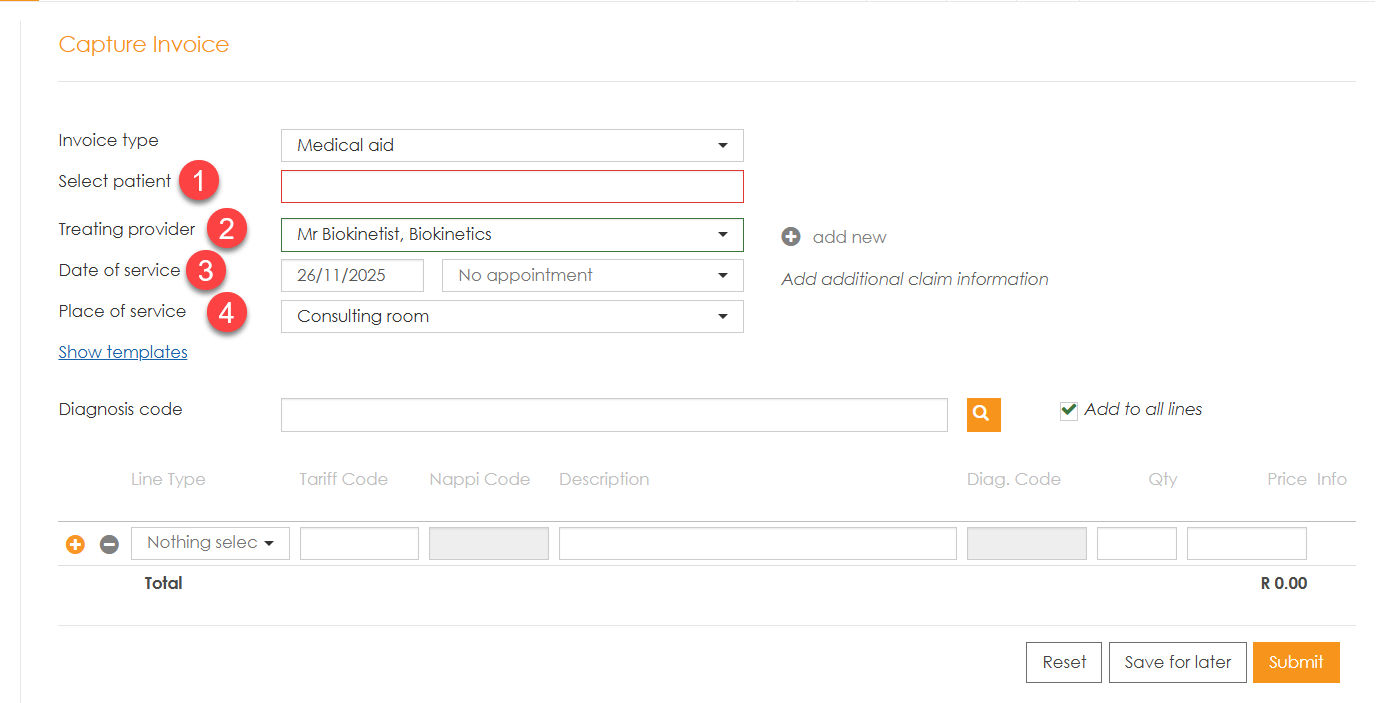
- Add the required information:
- ‘Select patient’ - By entering a minimum of 3 characters, the system will start to search through your patients to link the invoice to
- ‘Treating provider’ - Select the provider that you want to link to this invoice. If you change the provider after completing the invoice, note that all the invoice lines will be cleared.
- ‘Date of service’ - Today's date will be added automatically.
- ‘Place of service’ - The default is ‘Consulting room’
- Enter the ‘Diagnosis code’. If your patient has multiple diagnoses, enter them all, separated by a semi-colon. If you know the code, you can enter it directly. If not, you can search by description or by code. Clicking on the search icon will open a ‘Diagnosis’ window.


- Once you have completed the diagnoses, you need to complete the invoicing information.
- Once all procedures have been added, click on ‘Submit’. (If this were a cash claim, the button will display ‘Save’).

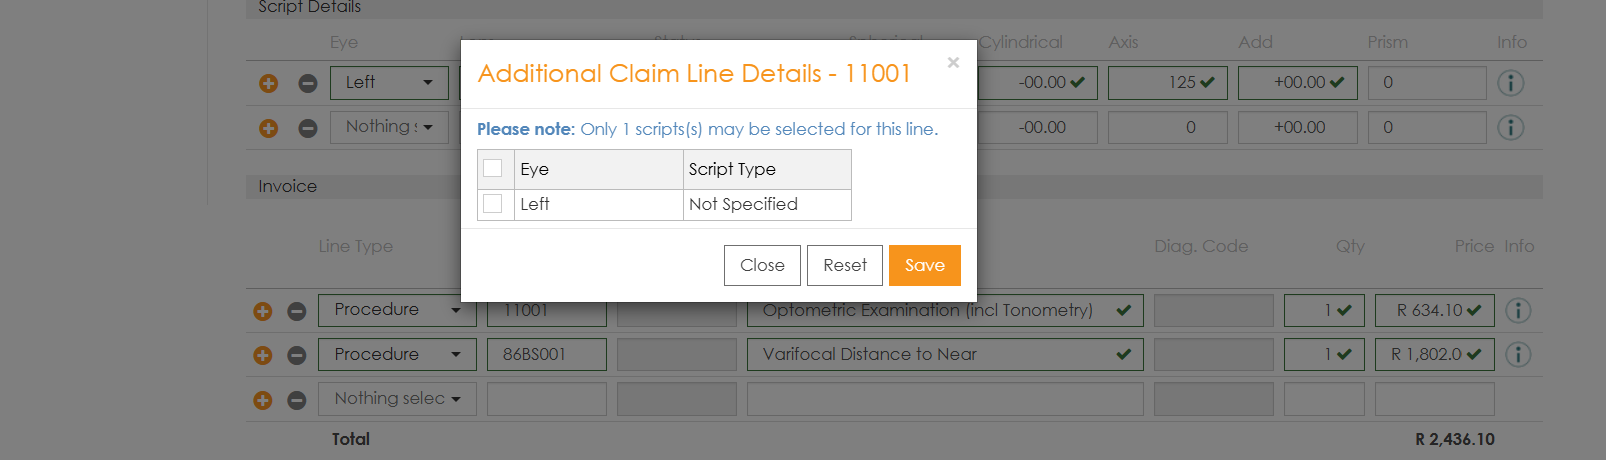
NB - For Optoms an additional step is required to Link the script to the claim lines. The 
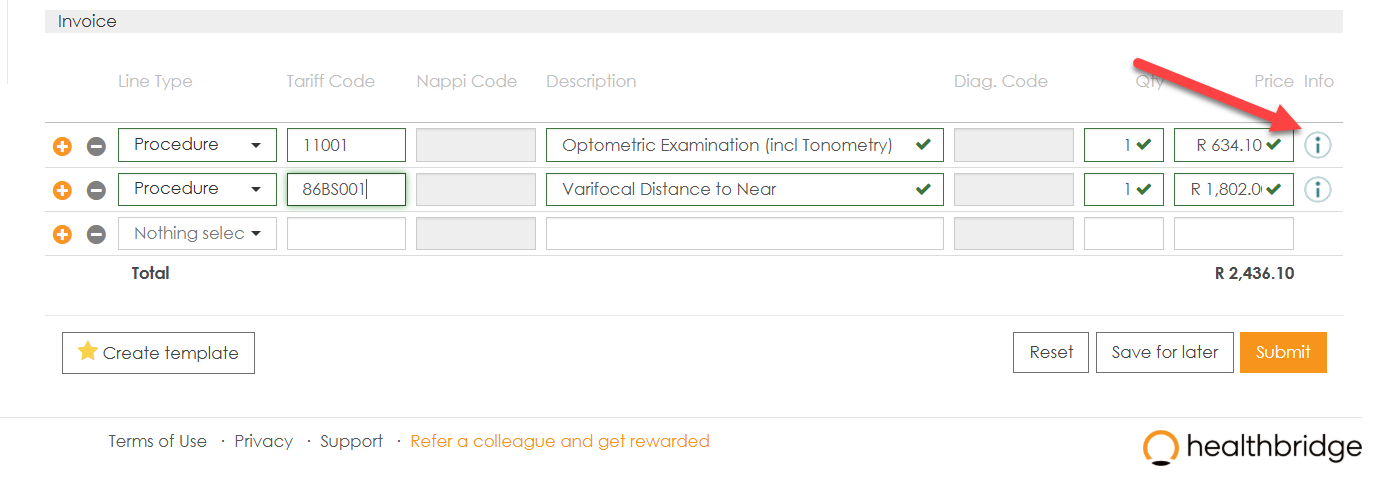
NOTE: myMPS allows one invoice to include multiple line items of procedures, medications, and consumables. However, claims are processed per invoice and cannot be submitted as multiple claims at once.